
There’s an effective, long-lasting solution to reduce heat gain, lower energy bills, and protect your furnishings in Maricopa: professional window tinting. This seasonal care guide shows you how proper tint selection, expert installation, and simple maintenance maximize comfort, UV protection, and HVAC efficiency so your home stays cooler year-round.
Understanding Window Tinting
You should focus on measurable performance: modern films block up to 99% of UV radiation, cut solar heat gain by roughly 30-60% depending on film type, and range in visible light transmission (VLT) from about 5% (very dark) to 70% (nearly clear). You’ll see ceramic films deliver high heat rejection without signal interference, metalized films add durability but can cause reflections, and warranties typically run 5-10 years when professionally installed.
Types of Window Tinting
You’ll encounter five common film categories: dyed (low cost, 20-30% heat rejection), metalized (35-45%, durable, reflective), carbon (40-50%, rich appearance, no signal interference), hybrid (35-55%, blended performance), and ceramic (45-60%, top heat rejection and clarity). Choose based on heat rejection, VLT, signal interference, aesthetics, and budget – for Maricopa summers aim for >40% heat rejection when possible.
- Dyed: economical option, reduces glare and provides privacy but can fade faster.
- Ceramic: premium choice, high heat rejection, stable color, no radio interference.
- After installation, expect a 1-3 day cure time and a professional warranty of 5-10 years depending on the manufacturer.
| Dyed | 20-30% heat rejection |
| Metalized | 35-45% heat rejection |
| Carbon | 40-50% heat rejection |
| Hybrid | 35-55% heat rejection |
| Ceramic | 45-60% heat rejection |
Factors to Consider Before Tinting
You should weigh local VLT regulations (many jurisdictions set front-side minimums around 30-35%), desired glare reduction, heat rejection percentage, cost ($5-$15 per sq ft installed typical), expected energy savings (films can lower cooling load by up to ~30% in strong sun), warranty length, and whether signal interference matters for your devices. Also account for window orientation-south- and west-facing glass typically benefit most.
- Regulations: verify Maricopa and Arizona rules for front and windshield VLT limits before selecting film.
- Budget: high-performance ceramic costs more upfront but often pays back through lower AC runtime.
- This helps you prioritize which windows to tint first-usually west-facing living areas or sun-exposed bedrooms.
You’ll also want to evaluate installer quality: check certifications, ask for before/after photos, confirm a clean-room installation process to avoid dust inclusions, and request a written performance spec (VLT %, heat rejection %) tied to the warranty. For example, installers who use wet-application with tempered, dust-free environments report <2% rework rates versus DIY attempts. Assess ROI by comparing installation cost to estimated annual cooling savings; a $1,200 job that saves 15% on a $1,200 annual cooling bill returns value within about 6-7 years.
- Inspections: demand written proof of film specs and a clear warranty for edge peeling and delamination.
- Installer track record: prefer technicians with at least 3 years’ experience and client references in Maricopa.
- This gives you the data to choose a film/installer combination that meets performance and longevity expectations.
Professional Window Tinting Benefits
Among the biggest advantages of professionally installed window tinting are reduced solar heat gain, UV protection and glare control. High-quality films can block up to 99% of UV radiation and reject 30-60% of solar heat, which in Maricopa summers over 110°F can lower interior temperatures several degrees and reduce cooling costs by roughly 10-30%. You also protect furnishings from fading and improve comfort room-by-room without changing blinds or HVAC.
Pros of Window Tinting
You get measurable energy savings, often 10-30% on cooling bills in sunny climates, plus UV blocking up to 99% and glare reduction up to 85%. Films increase daytime privacy and, with safety/security options, help hold glass fragments after breakage. Professional brands like 3M or Llumar frequently offer industry warranties and optical clarity that preserves views while improving comfort.
Cons of Window Tinting
There are trade-offs: installed costs commonly range $8-$15 per sq ft depending on film and complexity, and darker films reduce daylight and outside views. Improper film or incompatibility with certain low-e or annealed glass can cause bubbling, delamination or thermal stress. Local HOA rules or historic-design restrictions may limit your choices.
Thermal stress and seal failure are the most technical risks: reflective or very dark films can create temperature differentials across insulated glass that, in rare cases, lead to cracking within 1-5 years. Warranties vary-factory-backed options may cover adhesive failure for 10-15 years while economy films often last 5-7 years. You should verify glass compatibility, ask for a signed installer warranty, and budget an additional $2-4 per sq ft for professional removal if you change films later.
Tips for Choosing the Right Tint
Compare film specs-VLT, UV rejection, and solar heat rejection-to match your comfort goals; ceramic films can block up to 99% of UV and reject as much as 70% of solar heat. If you have large south-facing windows that get 6+ hours of sun, prioritize heat rejection and low reflectivity. This helps you balance glare reduction, interior protection, and curb appeal.
- VLT: 5%, 20%, 35%, 50% – choose based on your privacy and daylight needs
- UV protection: up to 99% blockage to reduce fading of fabrics and floors
- Solar heat rejection: ranges of 30-70%-ceramic films often hit the higher end
- Finish: ceramic, metallic, dyed-select ceramic if you want minimal signal interference
- Warranty: 5-15 years – check transferability if you plan to sell your home
Evaluating Your Needs
If your living room has 200-400 sq ft of glazing facing west and gets late-afternoon heat, choose films with 50-70% solar rejection and VLT around 20-35% to cut peak heat by 3-8°F inside; for bedrooms where privacy matters, 5-20% VLT provides darkness without losing HVAC efficiency. Also weigh your room use, furniture fade rates (measure color loss over a year), and whether you need a non-reflective finish for TV and monitor glare control.
Locating a Professional Installer
Ask for manufacturer certifications (3M, LLumar), a portfolio of Maricopa installs, and recent customer reviews; reputable shops will provide on-site measurements, itemized quotes, and IR thermography comparisons showing surface-temp drops of 10-30°F after installation. Verify warranty transferability and that installers use full-adhesion methods to minimize bubbling and edge lift.
Confirm the installer carries general liability and workers’ comp, offers a written warranty of at least 5-10 years, and schedules a post-install inspection within 48 hours; typical experienced teams complete a 6-8-window residential job in 2-4 hours, and they should demo a scrap sample so you can inspect clarity and reflectivity before committing.
Step-by-Step Window Tinting Process
Process at a glance
| Step | What it means for you |
|---|---|
| Assessment & Estimate | Technician measures glass, notes frame types and recommends VLT; you get a written quote-typical Maricopa single-family jobs (15-25 windows) often range $800-$1,600. |
| Measurement & Cutting | Glass is measured to ±1/8″, film cut oversized ~1/4″ for trimming; you can preview templates to confirm fit before application. |
| Cleaning & Masking | Installer performs a multi-step clean (90% isopropyl solution, lint-free squeegees), masks hardware; you should remove blinds and clear 2-3 ft around windows. |
| Application | Wet-spray alignment, squeegee from center outward with 6-8 overlapping strokes, edge trim to fit; you’ll notice immediate reduction in glare and heat. |
| Curing & Inspection | Edges trimmed, moisture allowed to clear 24-72 hours, final light and adhesion check; you receive care instructions and warranty paperwork. |
Preparing Your Home
Clear the work area by removing curtains, blinds and fragile decor, and move furniture 2-3 feet away from windows; secure pets and plan for 2-5 hours on-site for a 10-20 window job. You should set HVAC to a stable indoor temp (60-85°F) and ensure windows are accessible-this speeds cleaning and prevents delays common in busy Maricopa schedules.
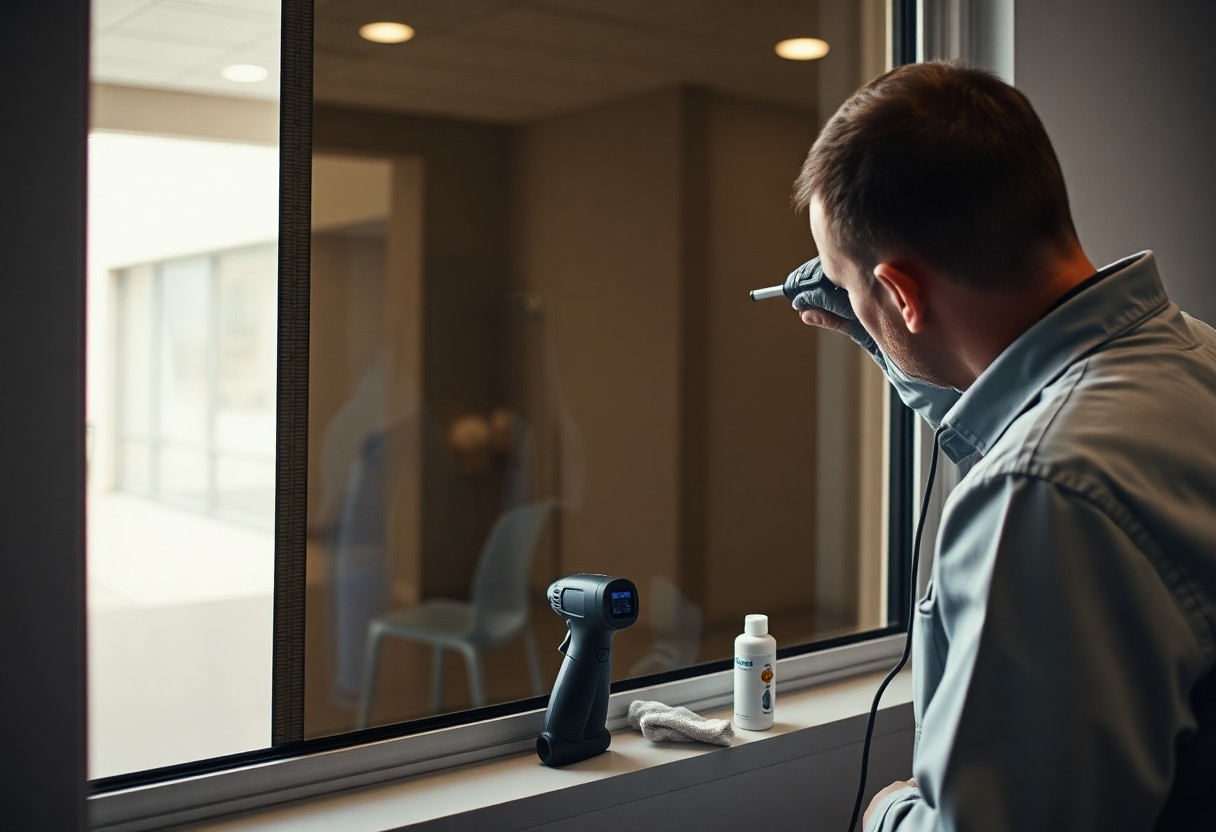
Application and Final Touches
During application the installer sprays a slip solution, aligns the pre-cut film, and uses a firm squeegee in 6-8 overlapping passes to expel moisture and air; edges are trimmed to a 1-2 mm reveal. You’ll be asked to avoid touching or cleaning the glass for 48-72 hours while the film bonds and moisture dissipates.
For more detail, technicians often use ceramic or multi-layer films 1.5-3 mil (38-75 μm) thick to balance durability and clarity; you may see installers use a heat gun on tempered or curved glass to contour the film, then perform a final inspection with an IR thermometer to compare pre/post surface temps. On average, proper installation in Maricopa yields a 20-40% reduction in solar heat gain and an interior temperature drop of 8-12°F depending on film choice and orientation, and you should receive explicit cleaning and warranty guidance tailored to your selected VLT and UV-rejection level.
Seasonal Maintenance and Care
Plan seasonal inspections every three months to catch edge lift, bubbling, or adhesive discoloration caused by Maricopa’s extreme heat swings (summer highs over 110°F, winter lows near 40°F). You should check seals, frames, and interior trim for moisture intrusion and measure visible light transmission (VLT) if you suspect fading-small hand-held VLT meters cost under $150. Addressing minor lifting within the first year avoids costly replacement later and preserves the film’s rated UV rejection (often up to 99%).
Keeping Your Tint in Optimal Condition
Clean your tint with a mild soap-and-water solution and a microfiber cloth; avoid ammonia-based cleaners that can break down adhesives. After installation, wait at least 7 days before rolling windows fully or doing a deep clean so the adhesive cures. You should never use razor blades on the film-use soft squeegees for stubborn residue-and inspect for pinholes or edge corrosion quarterly to prolong the film’s 8-12 year lifespan.
Seasonal Adjustments to Consider
In summer pair your window film with exterior solar screens or reflective blinds to boost heat rejection-screens can cut direct solar gain by 25-60% depending on mesh. During cooler months, use higher-VLT treatments or interior curtains where passive solar gain is desirable to reduce heating demand. You should avoid swapping films seasonally; instead, adopt adjustable shades and removable screens that let you fine-tune solar control without redoing the film.
Schedule professional inspections twice a year-spring and fall-to monitor performance and catch issues: have a technician evaluate bubbling larger than 1/4 inch, edge lift exceeding 5% of the perimeter, or adhesive staining. If your tint is over 10 years old or you notice a measurable drop in UV rejection or VLT drift, consider replacement; many Maricopa homeowners report 10-20% reductions in cooling load after professional ceramic film installation, so track energy use to quantify benefits.
Expert Recommendations
You should schedule professional tinting in spring or early fall when temperatures are 70-90°F for optimal adhesion; choose ceramic films rated 40-60% VLT for living areas to cut solar heat gain by up to 50% while preserving view, verify NFRC specs, and require a 5-10 year warranty plus installer references and photos of past Maricopa installs.
Additional Tips for Energy Efficiency
Pair your tint with attic insulation at R-38 and low-e window treatments to lower whole-home cooling load by roughly 10-15%; upgrade to insulated cellular shades on west-facing windows and use exterior awnings where possible. Any extra savings come from sealing frame gaps and setting your thermostat 4-6°F higher during peak heat.
- Install insulated cellular shades on south/west windows to reduce heat gain.
- Seal window frames with silicone or foam to cut infiltration.
- Combine tint with attic insulation R-38 for best results.
- Use a programmable thermostat and raise setpoint 4-6°F during daytime.
Common Mistakes to Avoid
You should avoid selecting ultra-low VLT films (under 10%) for main living rooms since they reduce daylight and can increase lighting costs; also skip bargain films without NFRC ratings and resist DIY installs that often produce bubbles, edge lift, and a 20-30% higher rework rate compared with pros.
In one Maricopa example, a homeowner installed 5% VLT in a family room and reported dimness and glare at night; swapping to 40% ceramic restored natural light and cut AC runtime 12%. You must also avoid ammonia cleaners and use manufacturer-approved solutions to prevent film clouding and adhesive failure.
To wrap up
Summing up, you secure year‑round comfort in your Maricopa home by investing in professional window tinting; it reduces heat gain, lowers your energy bills, protects your interiors, and simplifies seasonal maintenance. Trust certified installers to tailor films for performance and longevity so you enjoy consistent cooling and measurable savings.